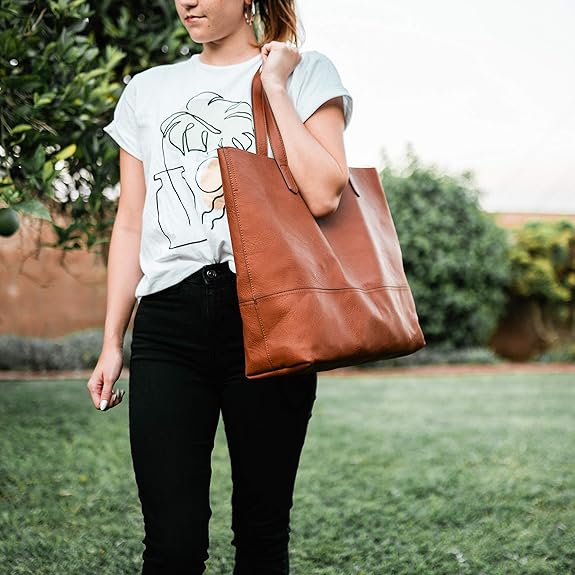
Have you ever wanted or needed a secret pocket to your backpack? \If the answer is yes then we can help.
A Secret Pocket in a backpack is a great way to give any valuables that little extra added security and keeps it even more hidden.
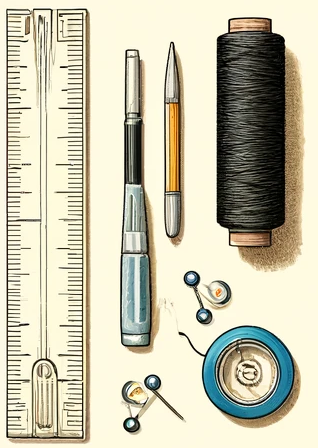
OK so lets begin, here are the materials you need:
- Fabric: Choose a fabric which will work with the current material of your bag, either the same or so it suits it to work along side.
- Scissors: You’ll need to cut the fabric to how you want it
- Thread: Select the right color here, as threat can stand out more than you think
- Needle: For hand stitching the pocket into place.
- Straight pins: To hold the fabric in place while you work.
Optional:
- Zipper or Velcro: If you prefer a closure for your pocket.
- Sewing machine: For those who want a quicker or more secure stitch than hand sewing.
Making use of these materials and having them to hand will be all you need to create your backpack secret pocket.
Next up, Selecting the location.
This is very important when it comes to keeping your secret pocket as stealthy as possible.
So lets consider these suggestions:
- Inside Flap: Its always a great place to put a secret compartment under or inside any flaps. Generally, the area is typically less noticeable and accessed less frequently.
- Back Padding: Placing a hidden pocket in the back padding helps keep them hidden from outside view.
- Side Panels: Side panels are great for smaller pockets and can be great when easy access is required.
Before you begin working on you make, do spend a few minutes thinking about how you use your bag, what access you need before making a final decision on where to put it.
Designing Your Secret Pocket
This is an important section on setting up your secret pocket, like any project the design stage will make or make the project.

Follow these steps to ensure your pocket fits perfectly within your chosen location:
- Measuring the Space: Always use a tape measure to accomplish this and determine the exact size which you need to work on and potentially install the pocket. Keep in mind the width and height that will not impede on the space already there without interfering with the backpack’s existing functionality.
- Cutting the Fabric:
- Lay your fabric on a flat surface.
- Ideally, Mark the dimensions on the fabric using a fabric marker or chalk (this acts as a temporary marking).
- Then, Cut the fabric according to your measurements, adding a half-inch margin around all sides for seam allowances.
- Shape and Style:
- Decide the shape and size of your pocket, for instance, a flat pocket or one with a bit of depth for bulkier items.
- For a deeper pocket, consider adding a pleat or gusset to the bottom of the fabric cutout.
- Mock Placement:
- Now use Pins, to pin in the fabric piece to the chosen area inside the backpack.
- At this point then check for fit and make adjustments as needed to ensure it sits well within the compartment.
Sewing Techniques:
Once your pocket is designed and you are confident about how to proceed with what you need, it’s now time to attach it securely to your backpack.
Here are the steps to sew your secret pocket into place:
Prepare to Sew
Place the fabric where you want your pocket to be.
Use straight pins to secure the fabric to the backpack, ensuring it’s flat and wrinkle-free.
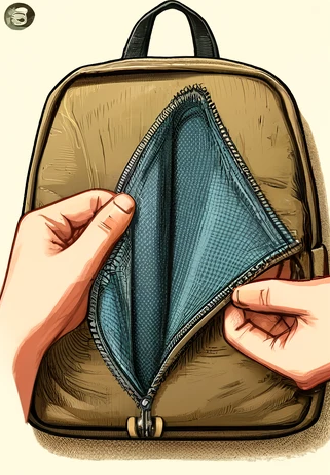
Hand Sewing:
Always use a thread, ideally to blend in with the fabric, you can use a different thread colour, but it will stand out, defeating the object of a stealth pocket 🙂
Start from the inside of the pocket to hide the knot.
Use a backstitch for strength and durability, sewing around the perimeter of the fabric, leaving the top edge open, obviously!
Using a Sewing Machine (Optional):
For those of you who prefer using a sewing machine, make sure to set it to a straight stitch.
Then, Carefully sew around the edges of the pocket, removing pins as you go.
Reinforce the Edges:
Now let’s strengthen the edges , to do this go over the corners and the top edges of the pocket again to ensure they are strong and will not easily tear, often corners can be a weak point of additional pockets being added.
Final Inspection:
Once complete and sewn in place, inspect it to make sure there are no gaps or loose threads (trim where necessary)
Always test the pocket by placing items inside to ensure it holds well and is accessible.
If it is ever going to break, tear or loosen, you want to do it now, as your prepared to fix it instantly!
All you need to do is follow these sewing steps, your secret pocket will be both secure and neatly integrated into your backpack.
Closing Mechanism

Now what we need to do is ensure the contents of your secret pocket are secure. To achieve this, contemplate adding a closure mechanism, to many, this may be referred to as a zipper or velcro.
Here are the types of closures you can use for your hidden pocket and the steps to install them:
- Choosing a Closure:
- Zipper: Best choice, this method povides a secure closure and is most suited for pockets that will store valuable items.
- Velcro: A quicker and easier option to install, suitable for less valuable items.
- Buttons or Snaps: Offers a traditional closure method, which can be decorative as well as functional.
- Installing a Zipper:
- Measure the opening of your pocket to determine the zipper size.
- Cut a slit slightly shorter than your zipper length at the top of the pocket.
- Pin the zipper in place, aligning it with the slit.
- Using a sewing machine or hand stitch, sew along the edges of the zipper ensuring it’s secure.
- Applying Velcro:
- Cut strips of Velcro slightly shorter than the width of your pocket’s opening.
- Sew one strip to the inside of the pocket’s top edge and the corresponding strip to the backpack interior, ensuring they align when pressed together.
- Attaching Buttons or Snaps:
- For buttons, sew the button to one side of the pocket opening and create a buttonhole on the other side.
- For snaps, attach one part of the snap to the pocket flap and the corresponding part to the body of the pocket, ensuring they line up when closed.
- Testing the Closure:
- Once installed, test the closure to ensure it opens and closes smoothly and secures the pocket contents effectively.
Adding a closure not only helps with the security of your secret pocket but also gives it a finished professional look, ensuring your belongings are safely tucked away.
Additional Tips and Tricks:
- Maintenance Advice:
- Regularly check the integrity of the pocket and make sure it is strong and remains in place, all the more so if adding shape objects
- In the event of the pocket starting to loosen, reinforce it with additional stitches or fabric adhesive (temporary measure.
- Suitable Items for the Secret Pocket:
- Electronics like phones or MP3 players that benefit from extra protection.
- Important documents or ID cards that need to be kept out of sight.
- Small personal safety devices such as pepper spray or a personal alarm.

